Why Float Switches Fail In Cooling Towers And What To Use Instead
Float switches are simple. That is part of the appeal. A float rises, a float falls, and the system responds.
At least, that is the idea.
In a real cooling tower, things are rarely that tidy. Water is moving. Heat is constant. Minerals build up. Parts age. Debris gets where it should not be. A float that worked fine last season may start hanging up, sticking, or giving the wrong signal just when the building needs the tower to behave.
That is why many facility managers eventually start looking for something better than the old mechanical float setup.
Float Switches Have Moving Parts
The biggest weakness of a float switch is also the most obvious one. It moves.
Any part that moves can wear, stick, corrode, loosen, or get knocked out of position. In clean water and easy conditions, a float switch may last a long time. In a cooling tower basin, it has a harder life.
Scale, biofilm, rust, treatment chemicals, vibration, and changing water conditions can all make a simple float less reliable. The failure may not happen all at once. It may start with short cycling, odd fill behavior, or a water level that never seems quite right.
That kind of problem wastes time because it is not always obvious from the ground.
Bad Level Control Can Create Bigger Problems
A poor water level signal is not just a nuisance. It can affect the way the whole system runs.
If the basin level gets too low, pumps and equipment may be put at risk. If the level gets too high, water can be wasted or overflow where it should not. If the control keeps cycling on and off, valves and other parts may take unnecessary wear.
In commercial buildings, hospitals, data centers, manufacturing sites, and other facilities, nobody wants a cooling tower issue to become the reason everything else gets attention.
Good level control is not glamorous, but it matters.
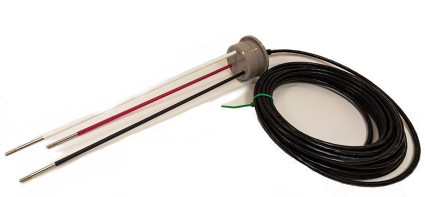
Electronic Controls Remove The Mechanical Float
Electronic water level controls are designed to take the mechanical float out of the equation. Instead of relying on a float arm or ball moving up and down, the system uses sensors and a controller to manage the water level.
That can be a major advantage in cooling tower basins, remote sumps, evaporative condensers, and similar applications.
With no traditional float to hang up, the system can be more stable and easier to trust. It can also provide clearer operating information, depending on the controller and setup.
Think About Maintenance, Not Just Purchase Price
A float switch may look cheaper at first. Sometimes it is. But the real cost is not always the part itself.
The real cost is the service call, the downtime, the repeated troubleshooting, the water waste, and the frustration of replacing the same type of component again.
If your team keeps fighting the same water level problem, the question is not only “What does the replacement cost?” The better question is “Why are we still dealing with this?”
That is where an electronic water level control can make sense. It may be the more practical long term choice for a system that needs to work without constant attention.
When To Consider Replacing A Float Switch
It may be time to look at another option if your float switch sticks, fails repeatedly, causes short cycling, gives inconsistent level control, or struggles in poor water conditions.
It is also worth considering an upgrade during cooling tower maintenance, equipment replacement, or control system improvements. If the tower is already being serviced, that can be a good time to solve the water level issue properly.
Talk To Waterline Controls
Waterline Controls manufactures electronic water level controls and sensors for cooling towers, tanks, sump controls, fire protection, HVAC systems, and other wet environment applications.
If you are tired of replacing float switches or chasing unreliable level control problems, Waterline Controls can help you choose a system built for your application.
Contact Waterline Controls today to ask about electronic water level controls for cooling towers and other commercial systems.
References
Waterline Controls Cooling Tower Level Controls
