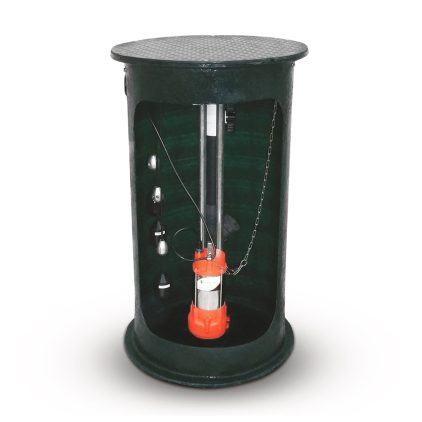
Where To Put Check Valve on A Sump Pump
A check valve on a sump pump is crucial for preventing backflow of water into the sump pit after the pump shuts off. Here’s exactly where and how to place it:
✅ Best Location for a Check Valve on a Sump Pump:
📍 Position:
-
Install the check valve on the discharge pipe, just above the sump pump, but below the basement floor level or first pipe bend.
Side View Diagram (Simplified):
House Exterior
↑
Discharge Pipe
↑
[Check Valve] ← ✅ Install here
↑
Vertical Pipe
↑
Sump Pump
↓
Sump Pit
🔧 Installation Tips:
-
Orientation Matters:
-
Ensure the arrow on the valve body points away from the pump, indicating water flow direction.
-
-
Use Unions or Rubber Couplings:
-
These make it easy to remove the valve for maintenance.
-
-
Leave Vertical Pipe Space:
-
Leave at least 8–12 inches of straight vertical pipe between the pump and the valve, if possible, to prevent turbulence.
-
-
Quiet Check Valves (Optional):
-
Consider a “quiet” or spring-loaded check valve to reduce clunking noises when the valve shuts.
-
❌ Avoid Installing:
-
Directly on the pump outlet—leave some vertical pipe.
-
Above floor level—water can drain back down the pipe and cause the pump to cycle unnecessarily.
Common Mistakes Made With Check Valves on Sump Pumps
Here are the most common mistakes people make when installing or using check valves on sump pumps, and how to avoid them:
❌ 1. Installing the Check Valve Backward
-
Mistake: The valve is installed in the wrong flow direction, causing no water to leave the pit.
-
Fix: Follow the arrow on the valve body, which should point away from the pump (toward the discharge line).
❌ 2. Installing the Valve Too High
-
Mistake: Placing the check valve far above the sump pit allows a large volume of water to drain back when the pump shuts off.
-
Fix: Install the check valve just above the pump, ideally 8–12 inches above the discharge port.
❌ 3. No Check Valve at All
-
Mistake: Omitting a check valve leads to backflow into the pit, causing the pump to cycle repeatedly and wear out faster.
-
Fix: Always install a check valve on the vertical discharge line.
❌ 4. Using the Wrong Type of Valve
-
Mistake: Using a swing check valve in a high-flow system can cause loud “water hammer” noises.
-
Fix: Use a spring-loaded or quiet check valve if noise or water hammer is a concern.
❌ 5. Poor Sealing or Loose Connections
-
Mistake: Leaky or improperly sealed joints around the valve may lead to water spray or air leaks.
-
Fix: Use rubber couplings with hose clamps or PVC glue (if using rigid PVC) to ensure a tight, sealed fit.
❌ 6. No Maintenance Access
-
Mistake: Installing the valve in a hard-to-reach place makes it difficult to service.
-
Fix: Use union fittings or quick-release clamps for easy removal and cleaning.
❌ 7. Valve Installed at an Angle
-
Mistake: Installing the valve at an angle can cause it to not close properly, allowing backflow.
-
Fix: Install the valve vertically for proper function.
❌ 8. Trapping Air
-
Mistake: A poorly vented line can allow air to get trapped, reducing pump efficiency.
-
Fix: Ensure there’s an air relief hole in the pump’s discharge pipe or in the pump housing, if recommended by the manufacturer.
Why Choose Water Line Controls
All of our water level controls and water level control systems are assembled right here in the U.S.A. where we monitor every step of the process. The are many reasons to choose Waterline Controls™ for all of your float switch and water level controller needs include:
SIMPLE DESIGN
No moving parts or mechanical floats to break or rust!
BEST TECH SUPPORT
No runaround, no guessing, no stupid answers. You’ll talk to the guy who’s been designing and installing these units for over 20 years.
BUILT TO LAST
Makes it easy to integrate with existing Building Management Systems and has an expected useful life of 15 years.
TOUCH TO TEST
One push of the button starts a complete validation cycle to ensure all systems are working properly.
RELIABLE & ACCURATE
Will not foul, plate, or deteriorate regardless of water quality.

